Wednesday, 2 August 2017

DB Adapter- Configurating Outbound Connection Pool in console

Hi All,

In my previous post I had created new Data Source in console.
I suggest you to go through  Create New Data Source before reading this post on Configurating Outbound Connection pool.

Okay! Hoping that the previous post has been read. Let's move ahead..

Steps to configure DB Adapter's Outbound Connection Pool in console:

1. Log in to console - https://host:port/console - click on the "Deployments" from left hand side panel.

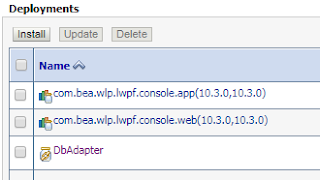
2. Navigating to DbAdapter 
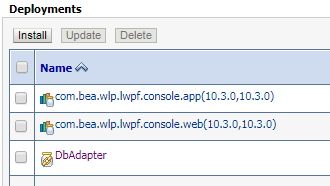

3. Click on DbAdapter, Navigate to "Configuration" next to "Outbound Connection Pool" - then click on New.

4. Provide a sensible JNDI name in the next wizard.


5. Click Finish. Then Expand Outbound connection pool configuration table to check for our newly       created connection.

    As we can see..It has got created!

6. Click on the same, this opens us a outbound connection properties table. This is important as we         need to link Data Source details to our outbound connection pool under "XADataSourceName"
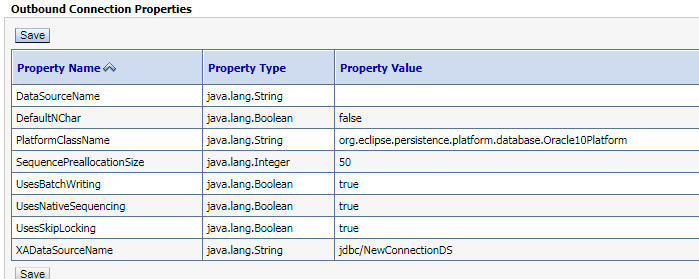

  In here I am linking the previously created DataSource  from previous post DataSource Creation to     this Connection Pool.
  Note: Press "Enter" and then "Save" this changes.

7. Forget not!! Navigate to Deployments,click on DbAdapter and "Update" the DbAdapter.


8. After updating, We can see successful Message. 


Now we have succefully configured outbound connection pool for DbAdapter!

Cheers!! 

To the next......  :)


Tuesday, 1 August 2017

Creating New Data Source in Console

Hi folks,

In this post I will give a brief steps on how to create a new Data Source in console.
This is required when we use DB adapter in our composite.

Once Data Source is created then with this we can connect it while creating new outbound connection pool of Db adapter in console.

Steps to create Data Source:

1. Go to https://host:port/console - click on Data Sources from the left hand side panel


2. Select Generic Data Source option in this step


3. Give any desired name for jdbc data source and give meaningful JNDI name


4. Click  next and choose the option as below: Here XA should be selected as it is significant to               perform 2 way global transactions.


5.Click next and then fill the details as per your data base connection details:My local connections are as below:

6.Click next and proceed, here provide your data base username and password and forget not to "test" your connection.

7.In the next step select target server as default server and finish.

8. As Finished we can find our newly created Data Source Name present under Data Source Table.


Cheers!! We created our Data Source in console succesfully..

Hope my readers can do the same!  :) 

To the next.....................

Working with DVM - Domain Value Maps in JDev12c

Hi All,

DVM is basically used to control values. It helps to map the data from one vocabulary to another.

Ex: Suppose we are having a domain which is representing Country name with a long name (United States), and another domain represent the same Country name as US.
In this case we can map the values using Domain value maps.

Domain value map values can be given at design time in Jdev then at run time the DVM columns are looked up to retrieve values.

Also we can edit the DVM after deployment by not touching the code, We can do this by visiting
http://host:port/soa/composer

Demonstration:

Here we are creating a composite which has a synchronous bpel process which takes name and city as input and will return name and coresponding city code as output.

Steps:
1. Create a new SOA Project give a name DVM_Proj and give a appropriate Composite name.
2. Create XSD having following elements
3. Now we can add Bpel component, configure for synchronous bpel exposed as SOAP service and for input variable select EmpDetails from already created XSD file, similarly for output variable select Empoutput as created in XSD file.


4. Create cities.dvm now- right click on project, New - from Gallery, Search for DVM, then choose Domain Value Maps.


5.Clik ok. A wizard opens give the name of the file as cities.dvm, and fill in the values as below:

6. We can add more Values to DVM file by following this step - clicl on "+" symbol in this wizard to add n number of rows and columns. In this case I have added only one new row "kolkata" with code "KO".


7.Now our Composite will look something like this


8. Now we can edit our bpel process - add assign activity in between recieve and reply activity.

9. Its time to edit the asign activity -

 a) Do a direct copy from Fname from Input side to Fname on Output side.
 b) Drop an expresion on ns1:city on Output side and write this Xpath expresion which does DVM          lookup on columns and retrives city code in the place of city name.

General DVM Xpath expression:
dvm:lookupValue(dvmMetadataURI as string, SourceColumnName as string,SourceValue as string, TargetColumnName as string, DefaultValue as string) as string. 

For our project it runs like this:
dvm:lookupValue("cities.dvm","CityName",$inputVariable.payload/ns1:City,"CityCode","")


Click on Apply and OK.

10. Save all. Now its time to deploy the composite to EM.

Testing Composite: 

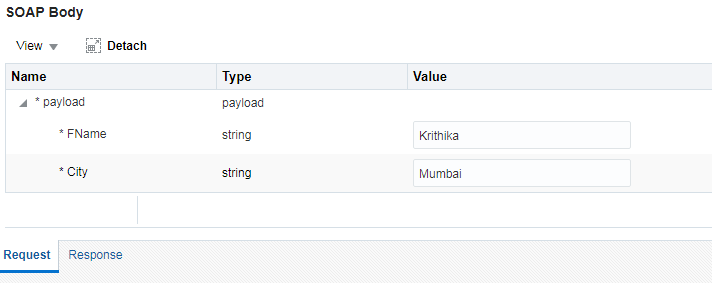
Once succesfully deployed, go to em click on the composite name, click on request to provide our input payload.


After giving input - test the webservice and check for the response.


Yes its a success! Our lengthy city name input "Mumbai" got DVM looked up to a new code as "MB".

We can check for multiple records as present in the dvm file for the same scenario.

Hope this post will help many to learn about Domain Value Maps usage in our projects!

Cheers! and to the next post.....